Preparing the Frames for Your Animated GIF in Photoshop CS5
An animated GIF in Photoshop CS5 is actually five separate images that you are going to arrange as layers. Each layer is going to represent a frame of your image, so each frame needs to be slightly different to help indicate that there is an action or movement occurring in your animated GIF. For the purposes of this tutorial, I am going to be creating an animated GIF in Photoshop CS5 of a star that is moving across a black background. The animated GIF is going to consist of five different frames, wherein the star is at a slightly different location in each frame. The separate images look like this:
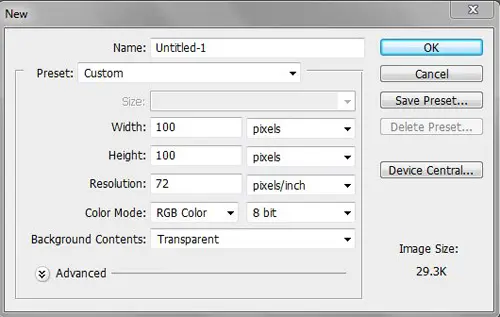
For the sake of simplicity, I have labeled the images as 1.gif, 2.gif, 3.gif, 4.gif and 5.gif, which will help me to remember the order in which I want to display them. Each image is the same size, 100×100 pixels. To begin making an animated GIF in Photoshop CS5, you can now launch Photoshop, click File at the top of the window, click New, then set the size for your image. Once your image parameters are set, click the OK button to create your blank canvas.
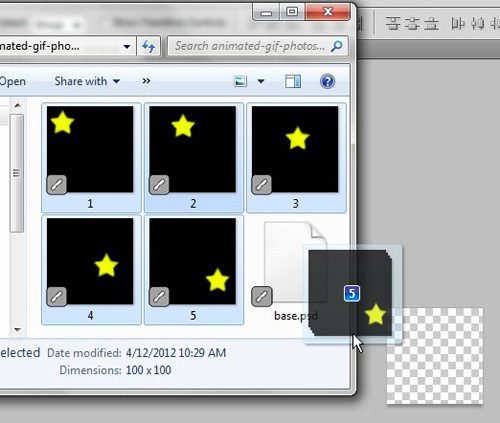
The next thing to do is open the folder containing the images that you are going to include in your animated GIF in Photoshop CS5. Note that you are opening the folder in Windows Explorer, NOT with the Open command in Photoshop. Windows Explorer is the program that you use to browse through folders and files on your computer, and you can launch it by clicking the folder icon in the taskbar at the bottom of your computer screen. Once the folder containing your images is open, hold down the CTrl key on your keyboard to select all of the images then drag them to the Photoshop CS5 canvas.
This will change your canvas to show one of your frames with an X over it, such as in this image:
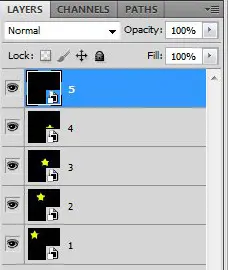
When you see this, press Enter on your keyboard to insert each image as a layer in Photoshop. Once all of the images have been added, your Layers window at the right side of Photoshop should look like this.
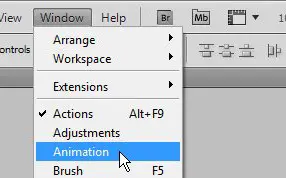
Note that the image that you want to display as the last frame of your animated GIF should be the topmost layer. If your layers are in the wrong order, you can simply drag them around within the Layers window until they are in the correct order. Now you need to open the Animation window, which you can do by clicking the Window menu at the top of Photoshop, then clicking the Animation option. The Animation window will open as a horizontal window at the bottom of Photoshop.
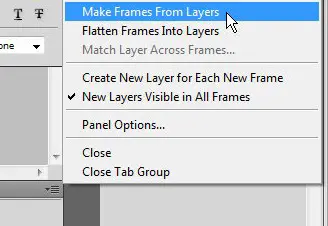
Click the button at the top-right corner of the Animation window (the button looks like a downward-facing arrow next to 4 horizontal lines), then click the Make Frames from Layers option.
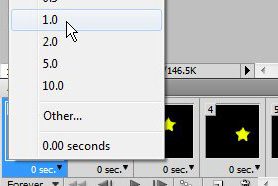
Click the downward facing arrow to the right of 0 sec and under one of your frames in the Animation window, then select for how long you want that frame to be displayed in your animated GIF. Repeat this step for each frame of your image. I like to choose 1.0 for the duration of frames in many animated GIFs in Photoshop CS5, but experiment with different durations until you find the one that works best for you.
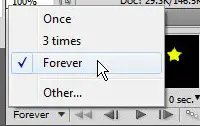
You can also specify how many times the animated GIF should loop through all of its’ frames by clicking the Forever drop-down menu at the bottom of the Animation window. I am using Forever as the option for the animated GIF at the end of this article, which means that the animated GIF will cycle through continually until you leave this page.
You are done creating your animated GIF in Photoshop CS5 now, so you have to save it. Click File at the top of the window, then click Save for Web & Devices. Click the drop-down menu at the top-right corner of the window to choose the GIF option, then click the Save button at the bottom of the window.
Type a name for your file into the File Name field, then click the Save button. You can then double-click the created image in your folder to launch the animated GIF and see what you have created. Below is my example animated GIF in Photoshop CS5 image.
After receiving his Bachelor’s and Master’s degrees in Computer Science he spent several years working in IT management for small businesses. However, he now works full time writing content online and creating websites. His main writing topics include iPhones, Microsoft Office, Google Apps, Android, and Photoshop, but he has also written about many other tech topics as well. Read his full bio here.
You may opt out at any time. Read our Privacy Policy
