How to Change Margins in Word 2013
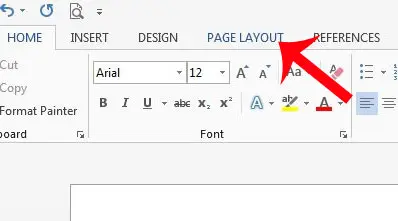
The steps below will allow you to change the margins for your entire document. You can elect to do this at any time. Note that changing the page margins will likely affect any existing layout customizations that you have made, so be sure to go back and proofread your document to fix any layout issues that occur. Step 1: Open your document in Word 2013. Step 2: Click the Page Layout option at the top of the window.
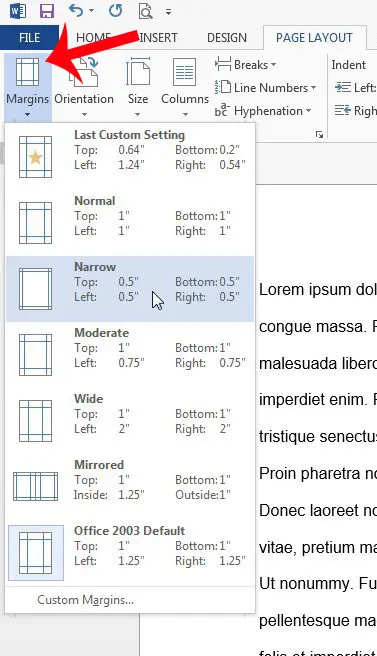
Step 3: Click the Margins button, then select one of the preset margin options. If none of the presets options meet your needs, then select the Custom Margins option at the bottom of the menu. If you are setting custom margins, then continue to the next step.
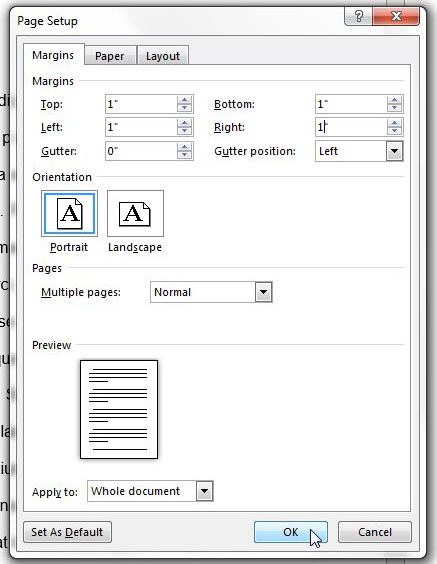
Step 4: Enter your desired margins into their appropriate fields at the top of the window. Click the OK button when you are done to apply the new margins to your document.
Do the formatting requirements for your document include page numbers? This article will teach you how to add page numbers in Word 2013. After receiving his Bachelor’s and Master’s degrees in Computer Science he spent several years working in IT management for small businesses. However, he now works full time writing content online and creating websites. His main writing topics include iPhones, Microsoft Office, Google Apps, Android, and Photoshop, but he has also written about many other tech topics as well. Read his full bio here.
You may opt out at any time. Read our Privacy Policy