Add a Font to Powerpoint 2010
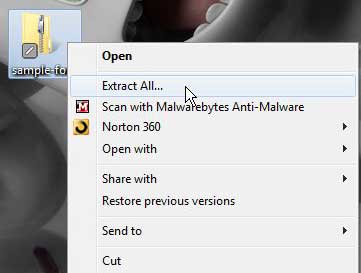
If you have never added a new font to your computer, then you may not be aware that any new font you encounter will need to be added through Windows 7. If you had been attempting to add the font directly through Powerpoint 2010, then you likely came away frustrated, as there is no such utility in the program. But you can add a new font to Powerpoint 2010 by installing it in Windows 7. This tutorial is going to assume that you have already downloaded the font to your computer and that the font is in a zip file, which is the common way that fonts are distributed. Continue reading to learn how to install that new font for Powerpoint. Step 1: Close Powerpoint 2010 if it is open. Be sure to save your presentation before doing so. Step 2: Right-click the downloaded font zip file, then click the Extract All option.
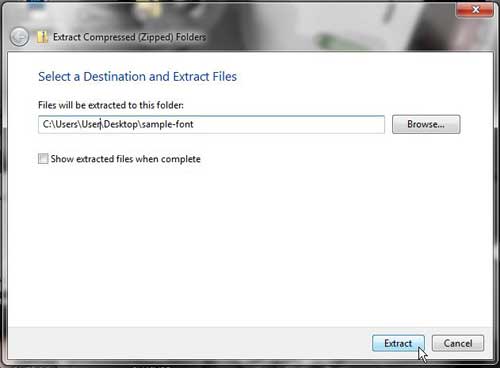
Step 2: Click the Extract button at the bottom-right corner of the window.
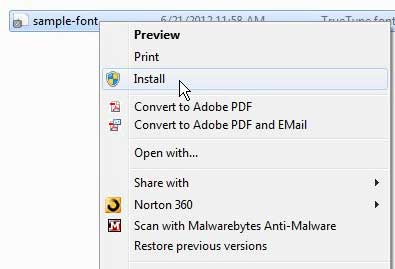
Step 3: Double-click the extracted folder. It will be in the same location as the original zipped font file, and the folder will have the same name as the zip file. Step 4: Right-click the font file, then click the Install option.
Step 5: Now that you’ve added the new font to Powerpoint 2010, you can launch the program and begin using the installed font. This font will also be in any other program that pulls its’ font list from the installed fonts in Windows 7. This includes programs like Microsoft Word and Microsoft Excel. After receiving his Bachelor’s and Master’s degrees in Computer Science he spent several years working in IT management for small businesses. However, he now works full time writing content online and creating websites. His main writing topics include iPhones, Microsoft Office, Google Apps, Android, and Photoshop, but he has also written about many other tech topics as well. Read his full bio here.