Our guide below will show you how to add more rows to a Word 2013 table if the current number of rows in insufficient. You can add these rows either at the end of the table, or above and below current existing rows in the table.
How to Add Additional Rows to a Word 2013 Table
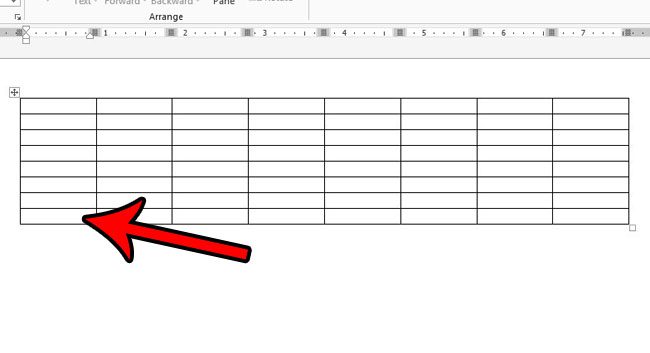
The steps in this article will assume that you have a table in a Word document, and that you wish to add additional rows to that table. Step 1: Open your document in Word 2013. Step 2: Click inside a cell in the row under which you want to start adding rows. I am clicking inside the bottom row of my table because I want to add more rows to the end of the table, but this method can be used for any location in the table where you wish to add more rows.
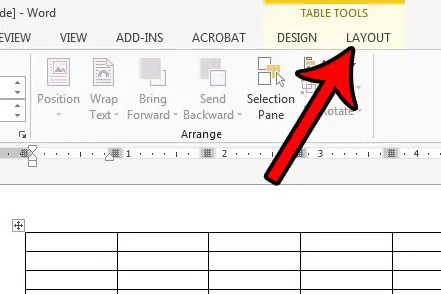
Step 3: Click the Layout tab under Table Tools at the top of the window.
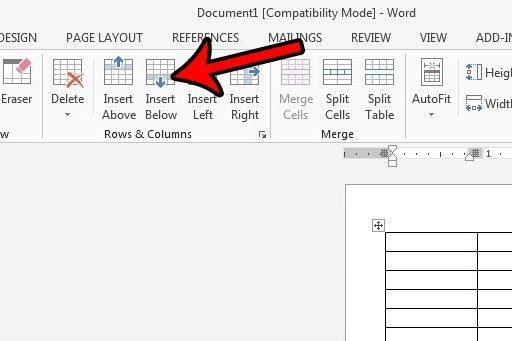
Step 4: Click the Insert Below button in the Rows & Columns section of the ribbon. Note that they are additional buttons in that section that you could alternatively use to insert columns in your table, or insert rows above the currently-selected row.
Do you have a table that you are trying to copy and paste into a different document, but the table is extending off the side or bottom of the page? Learn how to make a table fit on one page in Word by using an option called AutoFit. This is a very helpful feature that will save you a lot of frustration when dealing with Word table. After receiving his Bachelor’s and Master’s degrees in Computer Science he spent several years working in IT management for small businesses. However, he now works full time writing content online and creating websites. His main writing topics include iPhones, Microsoft Office, Google Apps, Android, and Photoshop, but he has also written about many other tech topics as well. Read his full bio here.
You may opt out at any time. Read our Privacy Policy


