But you might be interested in adding that button to the toolbar at the top of the window, too, if you think that would be more convenient. This location is called the Quick Access Toolbar, and provides you with the ability to put some commonly used functions in a location that can be a littler more convenient for you. So continue reading our tutorial below and see how to add a send and receive button to Outlook 2013’s Quick Access Toolbar.
How to Put a Send/Receive Button at the Top of the Screen in Outlook 2013
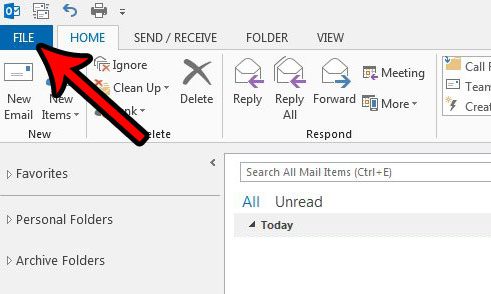
The steps in this article are going to show you how to customize the Quick Access Toolbar by adding a button that you can click to send and receive manually. Outlook will still continue to perform its regularly scheduled send and receive tasks if you click this button. Step 1: Open Outlook 2013. Step 2: Click the File tab at the top-left of the window.
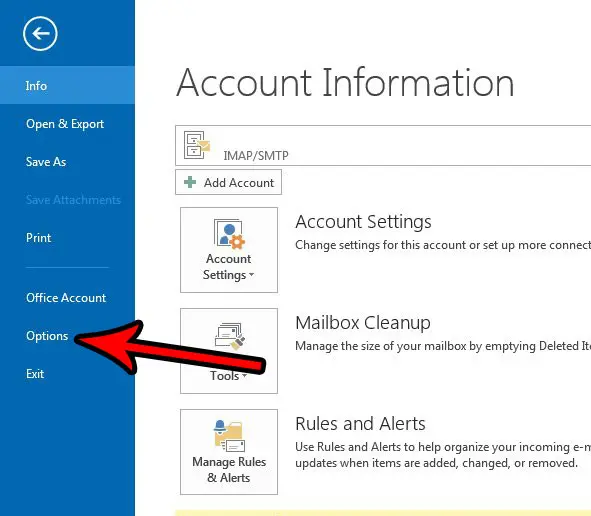
Step 3: Click the Options button at the bottom of the column on the left side of the window.
Step 4: Click the Quick Access Toolbar tab at the left side of the Outlook Options window.
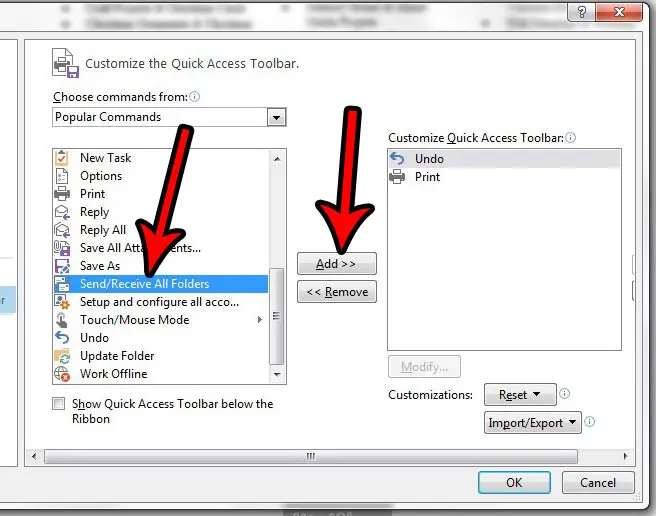
Step 5: Select the Send/Receive All Folders option in the left column, then click the Add button to put it into the right column. You can then click the OK button at the bottom of the window to apply the change.
Would you like to change the Outlook settings so that it check for messages more often? Learn how to change the send and receive settings in Outlook 2013 and make the application look for new messages as frequently as you would like. After receiving his Bachelor’s and Master’s degrees in Computer Science he spent several years working in IT management for small businesses. However, he now works full time writing content online and creating websites. His main writing topics include iPhones, Microsoft Office, Google Apps, Android, and Photoshop, but he has also written about many other tech topics as well. Read his full bio here.


