But a spreadsheet that you print in Excel 2013 will anchor itself to the top-left of the page by default, while you might prefer to have that spreadsheet centered on your page. Fortunately you can achieve this result by making just a few simple changes to the settings for your spreadsheet.
Center Your Spreadsheet on the Page in Excel 2013
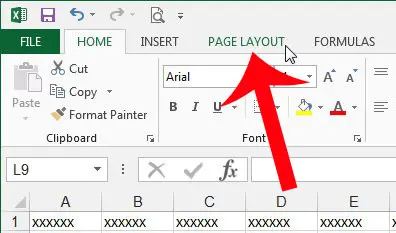
This article will show you how to configure your spreadsheet in Excel 2013 so that it prints on the center of the page. These steps will center the spreadsheet both vertically and horizontally. If you only wish to center it in one of these ways, then only select that option in Step 5 below below. Step 1: Open your spreadsheet in Excel 2013. Step 2: Click the Page Layout tab at the top of the window.
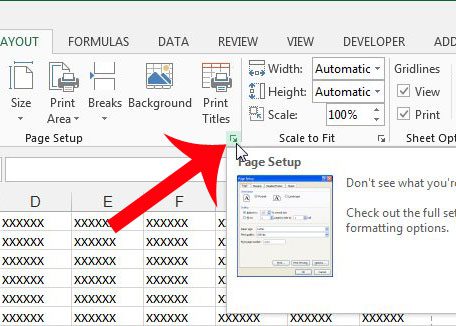
Step 3: Click the Page Setup button at the bottom-right corner of the Page Setup section of the ribbon.
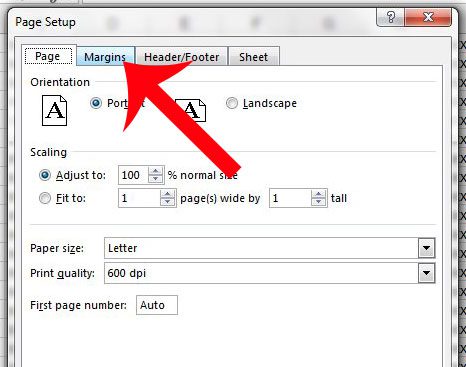
Step 4: Click the Margins tab at the top of the window.
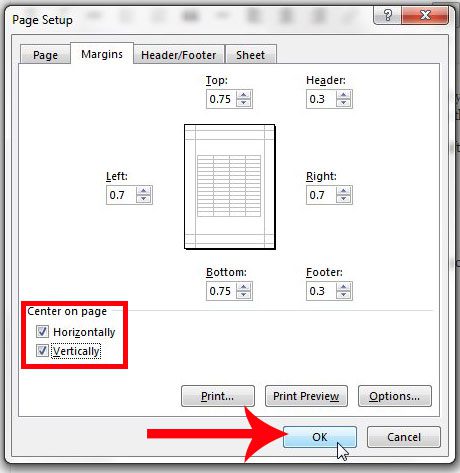
Step 5: Check the boxes to the left of Horizontally and Vertically under the Center on page section of the window. As mentioned earlier, you can choose to click only one of these options if you do not wish to apply a centering method to your spreadsheet. Click the OK button to save your changes.
Are there columns of your spreadsheet that are being printed on separate pages and causing you to waste a lot of paper? Use the fit all columns on one page setting to minimize the amount of paper that you use to print your spreadsheets. After receiving his Bachelor’s and Master’s degrees in Computer Science he spent several years working in IT management for small businesses. However, he now works full time writing content online and creating websites. His main writing topics include iPhones, Microsoft Office, Google Apps, Android, and Photoshop, but he has also written about many other tech topics as well. Read his full bio here.
You may opt out at any time. Read our Privacy Policy


