\
Changing the Nike GPS Watch Clock
The instructions for this procedure assume that you have already installed the Nike Connect software, and that you are using the most current version. If you are not using the most current version of the software, then you will need to follow the update instructions that appear when you connect the watch to your computer. Once you are running the most current version of the Nike Connect software, continue reading to learn how to change the time on the Nike + GPS watch. Step 1: Click the Start button at the bottom-left corner of your screen, click the Nike + Connect folder, then click the Nike + Connect option.
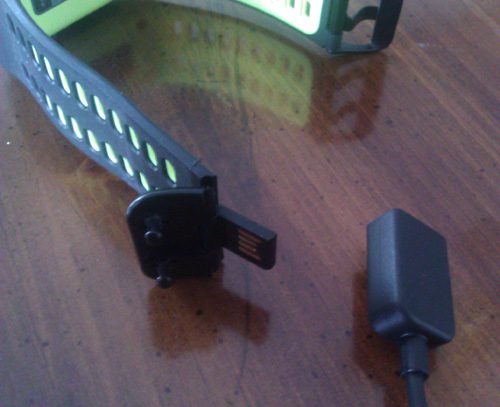
Step 2: Connect one end of the USB cable to a USB port on your computer, then connect the other end of the cable to the USB jack on the Nike + GPS watch. In case you are having trouble locating the jack, it is found underneath the end of one of the straps.
Step 3: If there is any run data on the watch, you will need to wait until it has uploaded. Step 4: Click the Settings drop-down menu at the bottom of the Nike Connect window.
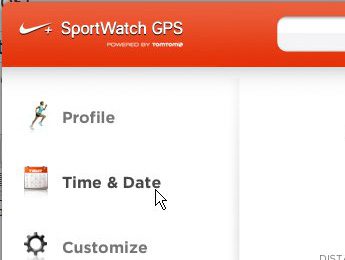
Step 5: Click the Time & Date option at the left side of the window.
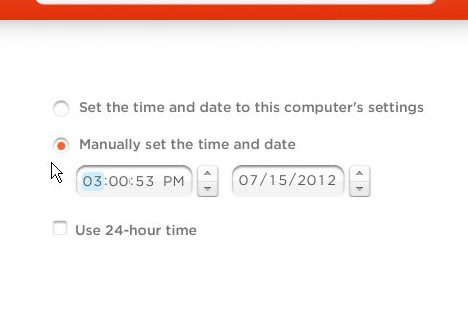
Step 6: Check the option to the left of Manually set the time and date, then change the time and date to the values that you want to use. You can change each element of the time and date on your Nike GPS watch by clicking inside the field that you want to change, then entering the values that you want to use.
Step 7: Once you have finished making your changes, you can disconnect the watch from your computer and shut down the Nike Connect program. After receiving his Bachelor’s and Master’s degrees in Computer Science he spent several years working in IT management for small businesses. However, he now works full time writing content online and creating websites. His main writing topics include iPhones, Microsoft Office, Google Apps, Android, and Photoshop, but he has also written about many other tech topics as well. Read his full bio here.


