How to Change the Default Normal Text Font in Google Docs
Our tutorial continues below with additional discussion about how to change your default font on Google docs, including pictures of these steps. Looking for a simple way to edit a PDF? our guide on how to convert PDF to Google Doc will show you how to do it in Google Drive. Google Docs includes a lot of settings and formatting methods that you can use to adjust the appearance of your text. You can use different fonts and colors, you can utilize subscript and superscript text, and you can modify spacing and margins with just a couple clicks. When you start typing text into a Google Docs document, it will use whatever your default font is. If you’ve never changed this before, then it’s likely the Arial font. But if you are changing the font every time you create a document, you might prefer to use something else. Google Docs uses a system called “styles” for text that you add to your document. There are a handful of styles for things like titles, headings, and normal text. Normal text is the style most commonly used for document text, and it’s likely the one that you use the most. Fortunately it’s possible to change the default font in Google Docs for any normal text that you type in a document. Find out how to use Outlook strikethrough formatting if you want to know how to draw a line through text when you compose emails.
How to Change a Default Font in Google Docs (Guide with Pictures)
The steps in this article were performed in the desktop version of the Google Chrome Web browser, but will work in other desktop browsers like Safari or Firefox, too. Note that this guide is only going to change the default font used for normal text. If you want to change the default font for titles or headings then you will need to select that text type from the dropdown menu in the toolbar and repeat these steps.
Step 1: Sign into Google Drive and create a new document.
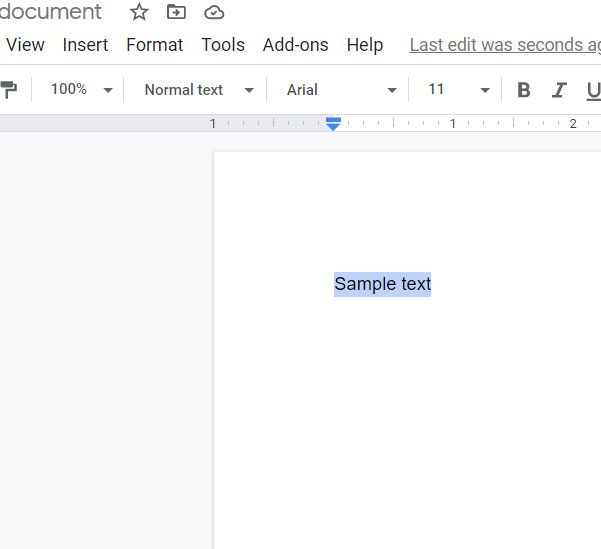
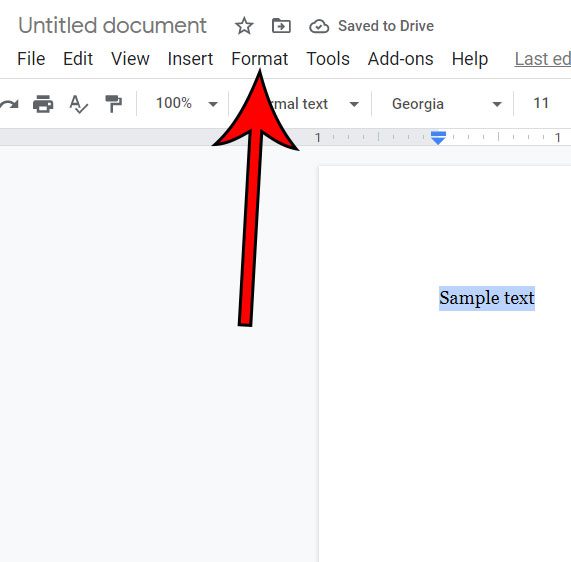
Step 2: Type some text into the document then select it.
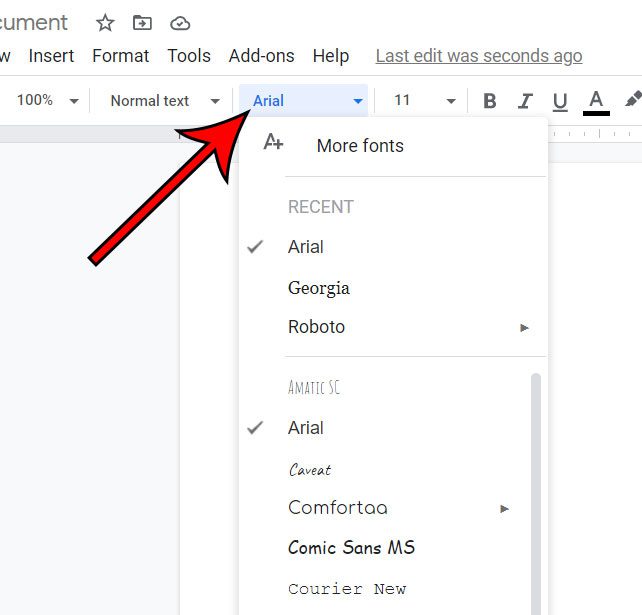
Step 3: Click the Font dropdown menu in the toolbar and select the desired font.
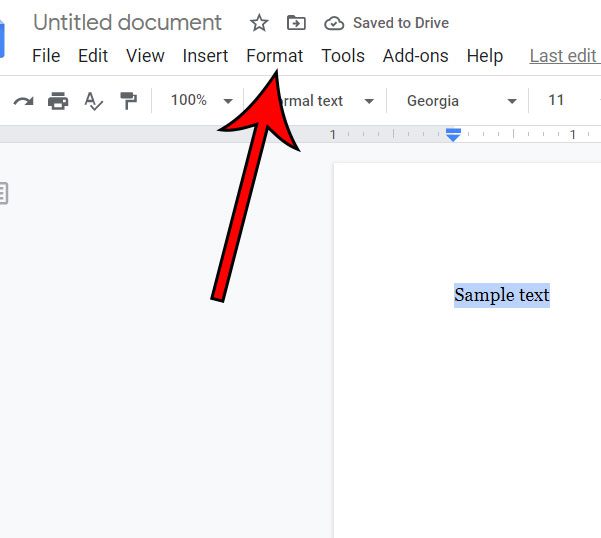
Step 4: Select the Format tab at the top of the window.
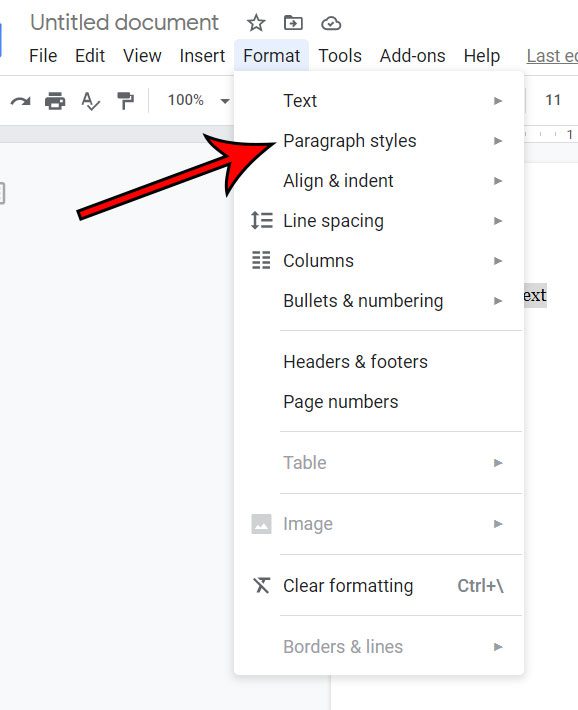
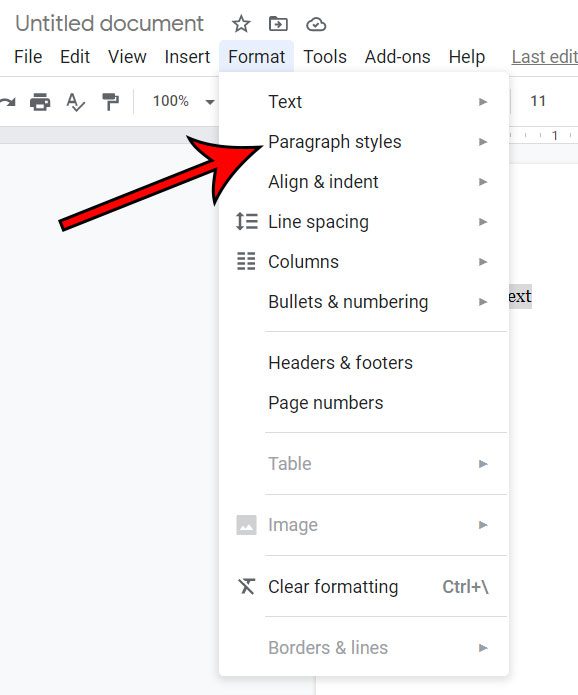
Step 5: Choose the Paragraph styles option.
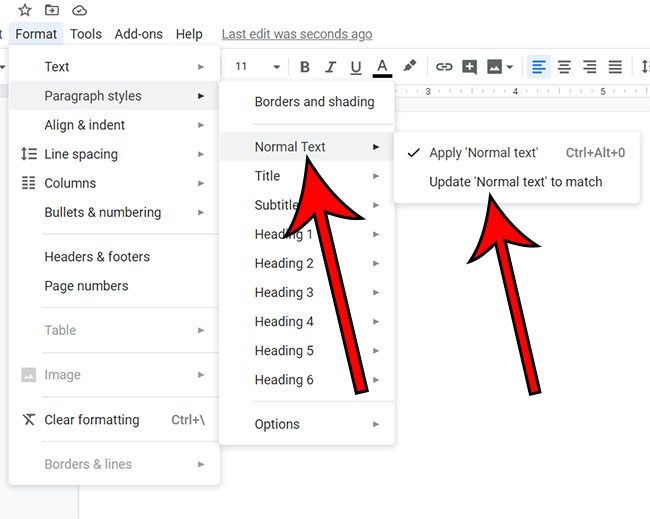
Step 6: Click the Normal text option, then select Update normal text to match.
Step 7: Click the Format tab again.
Step 8: Choose Paragraph styles again.
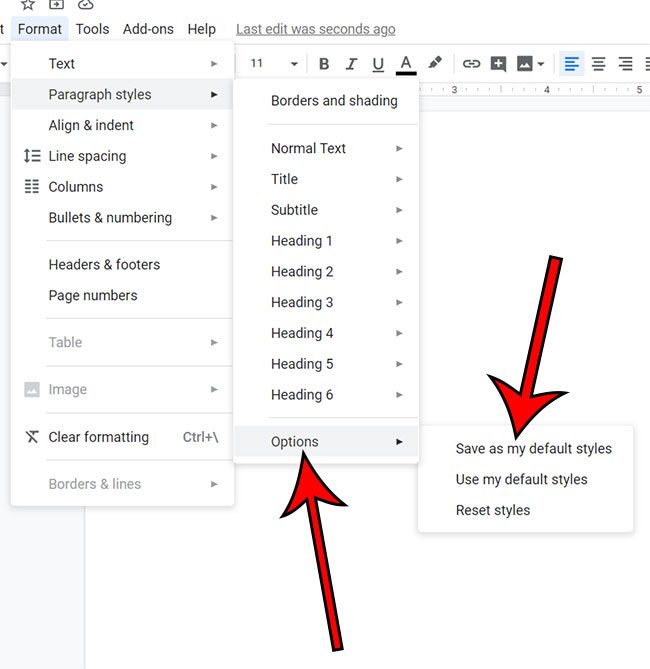
Step 9: Select Options at the bottom of the menu, then click Save as my default styles.
Now when you create a new document it will be using the default font that you just selected. Check out our Google Drive PDF article and find out how you can upload other file types to store them in Google Drive. Note that when you use the steps above as you are learning how to change your default font on Google Docs, that the button you need to click says “Save as my default styles.” This means that any other changes you have made to the following styles will also be saved as your defaults:
Normal textTitleSubtitleHeading 1Heading 2Heading 3Heading 4Heading 5Heading 6
So if you have been making a lot of format edits in this document and you don’t want to use all of them, then you might be better off making the change to your defaults in a different document. Note that existing documents won’t be affected by this change. It only applies to new documents that you create.
See also
How to change margins in Google DocsHow to add strikethrough in Google DocsHow to add a row to a table in Google DocsHow to insert a horizontal line in Google DocsHow to change to landscape orientation in Google Docs
After receiving his Bachelor’s and Master’s degrees in Computer Science he spent several years working in IT management for small businesses. However, he now works full time writing content online and creating websites. His main writing topics include iPhones, Microsoft Office, Google Apps, Android, and Photoshop, but he has also written about many other tech topics as well. Read his full bio here.
