You can do things like schedule the temperature that you want your home to be at certain times and on certain days of the week, you can set up things like emergency heat and fan usage, plus you can use the Nest’s ready-made temperature presets. These presets are labeled as Comfort, Eco, and Sleep, and are meant to provide you with a quick way to get your thermostat up and running so that you can take advantage of its ease and efficiency. But you might find that some of these temperatures are too high or too low, so you may be looking to change them. You can modify the Nest Thermostat presets by opening the Google Home app, selecting the Nest, tapping the gear icon, and selecting Temperature preferences, then choosing Temperature presets and changing them. Our guide below will provide you with instructions and additional help on making this adjustment on your thermostat so that you can make your home nice and comfortable.
How to Change the Comfort, Sleep, and Eco Presets on Your Nest Smart Thermostat
Our guide continues below with additional information on changing the Ready-made and custom presets that you are using for your Google Nest Thermostat.
How to Adjust the Temperatures on Your Google Nest (Guide with Pictures)
The steps in this article were performed on an iPhone 13 in iOS 15, but will also work on Android devices. This guide assumes that you have already downloaded the Google Home app and set up your Nest thermostat within it. If not you can download the Android version of Google Home here and the Apple version of Google Home here.
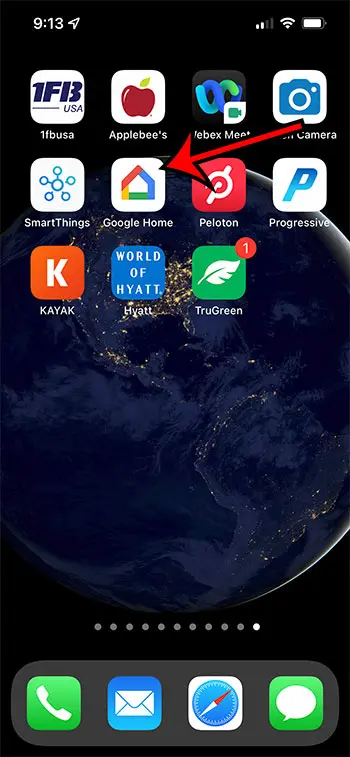
Step 1: Open the Google Home app on your device.
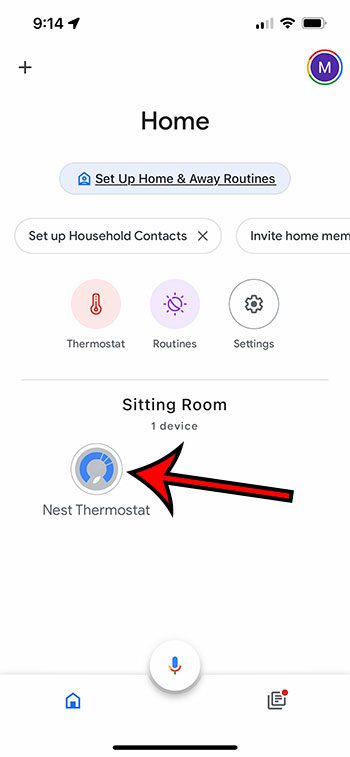
Step 2: Select the Nest Thermostat.
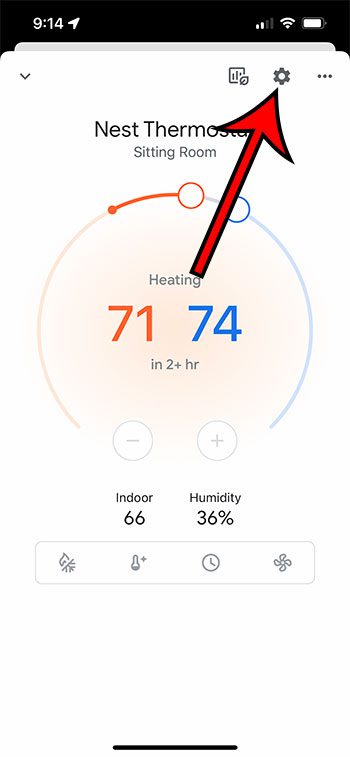
Step 3: Tap the gear icon at the top-right corner of the screen.
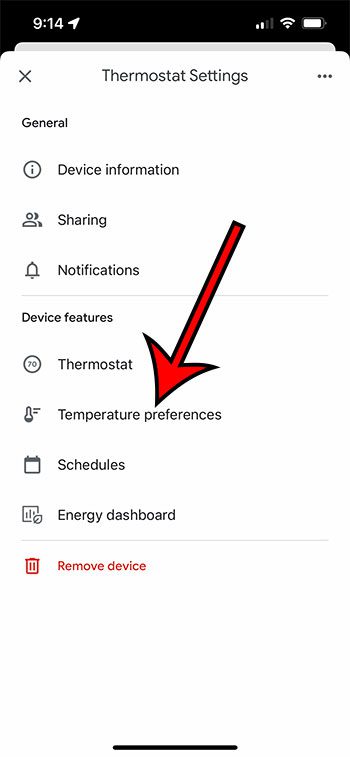
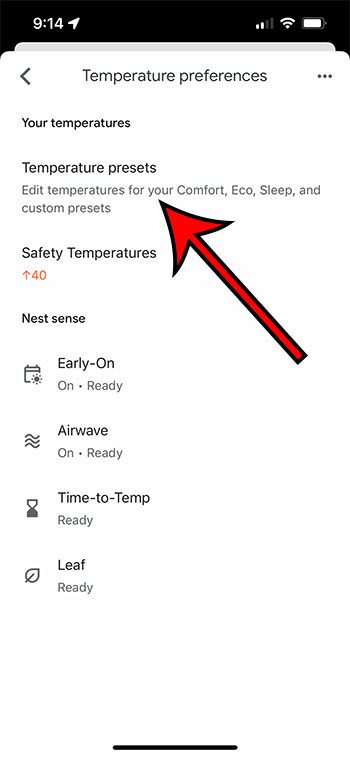
Step 4: Choose the Temperature preferences option.
Step 5: Touch the Temperature presets button.
If you had tried to do this before, then this is likely where you got stuck. I know that I didn’t realize that this was a button at first, and I didn’t try and tap it.
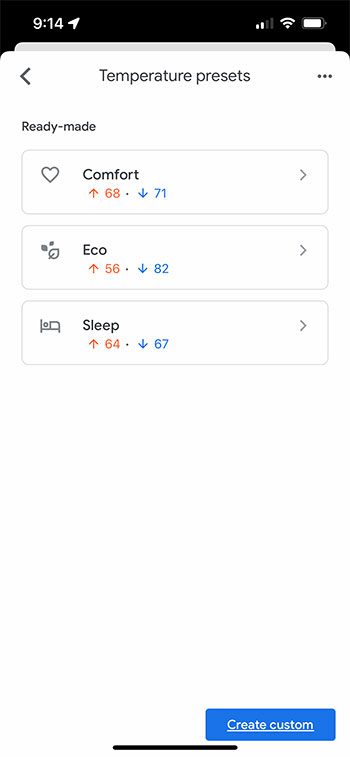
Step 6: Choose which of the listed presets you would like to adjust.
If you haven’t created any custom presets before then you probably only see Comfort, Eco, and Sleep like it is displayed in the image below.
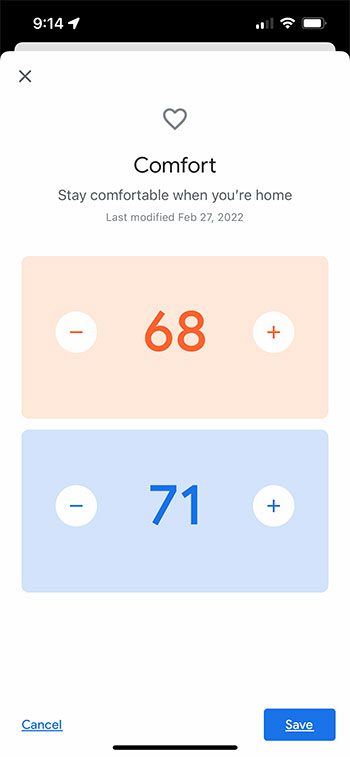
Step 7: Tap the – or + icon next to a temperature to adjust it. You can touch Save at the bottom-right of the screen when you are done.
Our guide continues below with additional discussion on changing the ready-made presets on a Nest Thermostat from the mobile app.
More Information on How to Change the Presets on the Google Thermostat
If you want other people in your household to be able to see and change the settings for the Nest then you can send them invites from within the app. You can find that invite feature by going to Thermostat > gear icon > Sharing > Household > Invite. Whoever you send the invite to will then need to download and install the Google Home app on their mobile device before they are able to control the thermostat. If your heating and cooling requirements are more extensive than the three temperature options listed here then you might need to add some more. You can do this from the Temperature presets screen in the tutorial above, then tapping the Create custom button at the bottom-right of the screen and following the instructions there. One of the nice things about using the temperature presets is that when you want to change a temperature setting on your schedule it will update everywhere that the preset is used. This can save a lot of time when you need to make it cooler or warmer in your home.
Additional Sources
After receiving his Bachelor’s and Master’s degrees in Computer Science he spent several years working in IT management for small businesses. However, he now works full time writing content online and creating websites. His main writing topics include iPhones, Microsoft Office, Google Apps, Android, and Photoshop, but he has also written about many other tech topics as well. Read his full bio here.
You may opt out at any time. Read our Privacy Policy
