It’s pretty common for the majority of emails that you receive to be junk, newsletters, and generally things that you just don’t care about that much. While unsubscribing from many of these can really help to reduce your inbox clutter, there are other emails that you might not actually read, but are hesitant to stop receiving. The Gmail inbox has an interesting solution for handling this, and it involves a tabbed system. It’s likely that you have seen this on a new Gmail account, or one using the default settings. The tabs we are talking about in this article are the Primary, Social, and Promotions tabs. Gmail can filter your emails into appropriate categories, that are separated into tabs. This lets you put emails from social networks, and marketing emails from businesses into their own tabs so that your primary inbox contains messages that are deemed to be important. Our tutorial below will show you how to switch to the tabbed interface in Gmail, and how to customize the tabs that appear there. If you’re reading this article because you want to know how to tab with a keyboard shortcut in Gmail when composing an email, then you will need to press Ctrl + ] on your keyboard. Note that this requires you to open the Settings menu and enable Keyboard shortcuts.
How to Use Tabs for Organization in Gmail
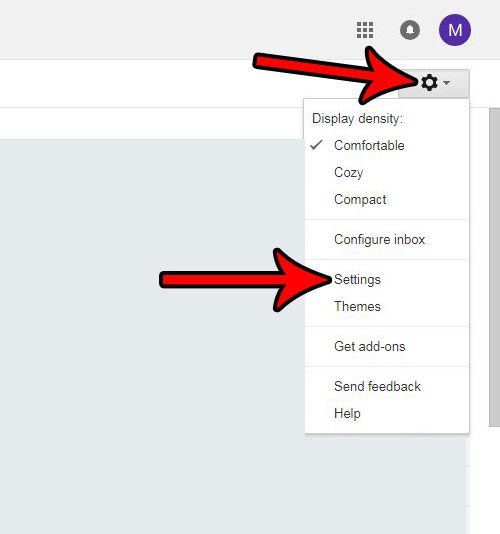
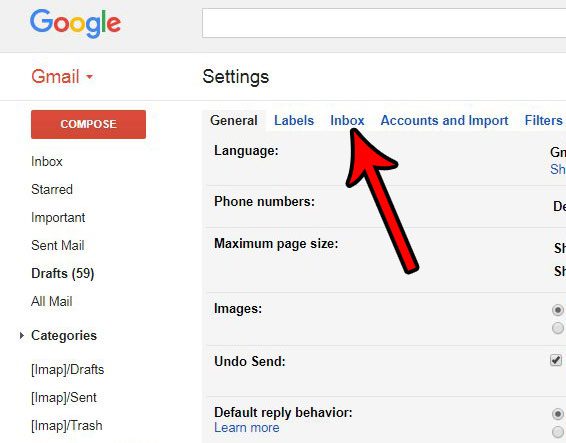
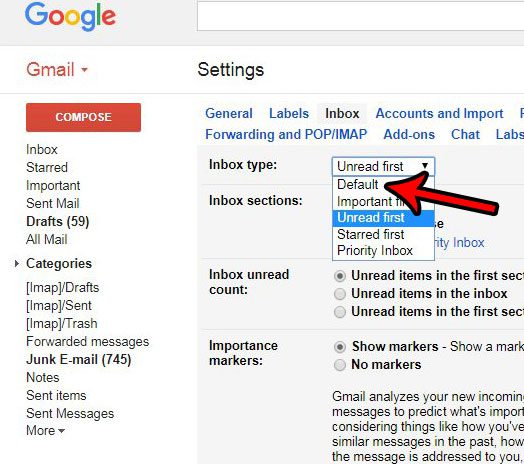
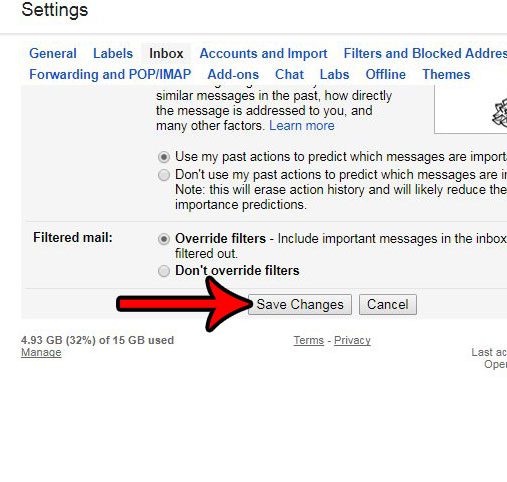
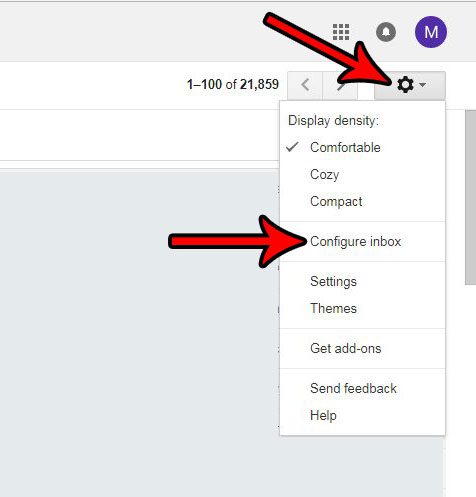
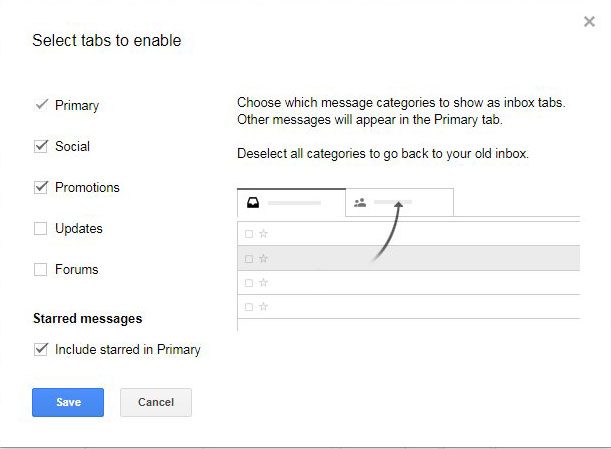
The steps in this article were performed in Google Chrome, but will also work in other Web browsers like Firefox or Edge. Note that this guide assumes that you are currently not using an inbox option that contains tabs in Gmail, but that you would like to do so. The first part of this tutorial will show you how to switch to the inbox setting that uses tabs, then the second part will show you how to customize those tabs. Step 1: Sign into your Gmail inbox at https://mail.google.com/mail/u/0/#inbox. Step 2: Click the gear icon at the top-right of the window, then select the Settings option. Step 3: Select the Inbox tab at the top of the window. Step 4: Click the Inbox type dropdown menu, then select the Default option. Step 5: Scroll to the bottom of the menu and click the Save Changes button. Your Gmail inbox should reload with tabs after a few seconds. Step 6: Click the gear icon again, then choose the Configure inbox option. Step 7: Select the tabs that you wish to enable, then click the Save button. As you can see in the picture above, the category tabs available for use in Gmail include:
PrimarySocialPromotionsUpdatesForums
You can enable any combination of these tabs. The ones enabled by default are Primary, Social, and Promotions. Have you ever sent an email that you immediately realized contained a mistake? Learn how to recall an email in Gmail and give yourself a small window after sending an email where you are able to prevent it from being sent. After receiving his Bachelor’s and Master’s degrees in Computer Science he spent several years working in IT management for small businesses. However, he now works full time writing content online and creating websites. His main writing topics include iPhones, Microsoft Office, Google Apps, Android, and Photoshop, but he has also written about many other tech topics as well. Read his full bio here.
You may opt out at any time. Read our Privacy Policy
