This extra movement, or animation, can be beneficial to your work with a minimal amount of effort. But you might be wondering how to add animation in Google Slides if you can’t find the tool, or if you’ve used it before in Microsoft Powerpoint and would like to use it in Google’s slideshow app as well.
How to Use Animation in Google Slides
Our article continues below with additional information on how to use animation in Google Slides, including pictures of these steps. You can read this to learn more about different list styles in Google Slides, such as bullet points. Adding movement to some of the elements in a Google Slides presentation is a good way to spice up your information. It’s fairly common for slideshow presentations to be a little boring in nature, and the addition of a movement effect, such as animation, can help to keep your audience’s attention a little more easily. One way that you can do this is by adding some animation to a picture in your slideshow. There are a number of different animation effects that you can use, including a couple of different “fly in” options where the picture will seemingly move into its place in the slide from one of the sides of the screen. Our tutorial below will show you how to apply this effect. Need to spice up a document? Find out how to circle something on Google Docs using the Drawing tool, and see a number of different ways that you can edit images in the word processing application.
How to Add Animation to a Picture in Google Slides (Guide with Pictures)
The steps in this article were performed in the Google Chrome desktop Web browser, but will also work in other desktop browsers like Firefox or Microsoft Edge. This guide assumes that you already have a slide with a picture to which you want to apply this animation. Our guide on how to add a border to an image in Google Slides can provide you with information on creating custom borders in your presentations.
Step 1: Sign into your Google Drive at https://drive.google.com and open the presentation file containing the picture that you wish to animate.
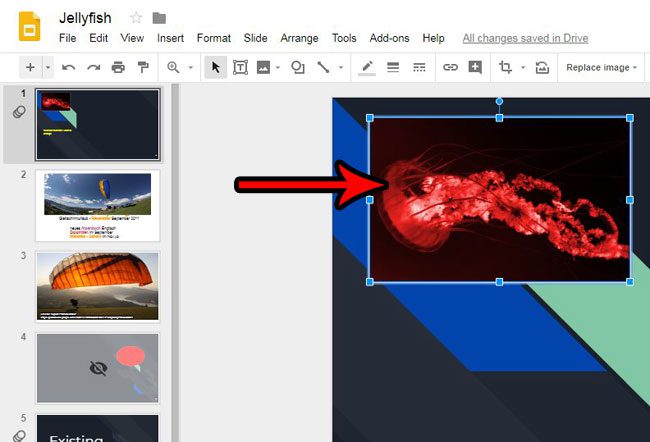
Step 2: Choose the slide with the picture from the column at the left side of the window, then click on the picture that you wish to animate.
Step 3: Click the Insert tab at the top of the window, then choose the Animation option.
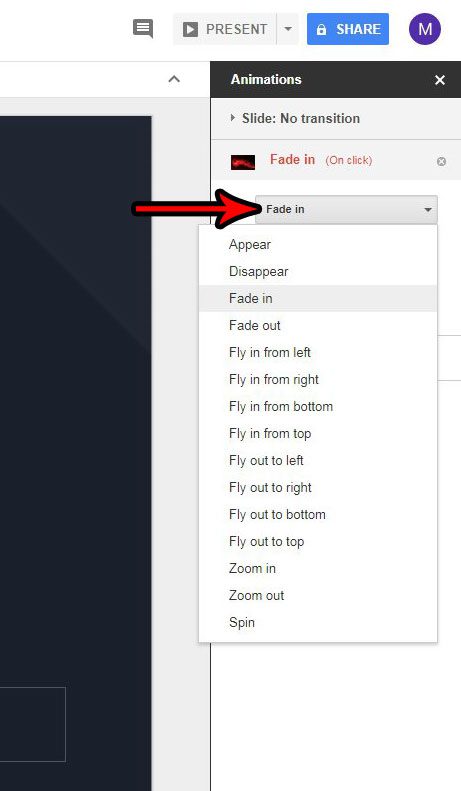
Step 4: Click the top dropdown menu in the column at the right side of the window, then choose the style of animation that you want to use.
Step 5: Click the dropdown menu underneath that and choose when you want the animation to occur.
Note that “On Click” means that you will need to click the slide for the animation to occur.
Step 6: Move the slider to select a speed for the animation, then click the Play button to see what it will look like. You can then click the Stop button to exit the animation preview.
Now that you know how to use animation in Google Slides you will be able to apply these types of effects to any picture you have in a presentation that would benefit from it. Have you finished creating your presentation, and you want to see what it will look like for your audience? Find out how to view your presentation in Google Slides to see the finished product of your work.
Additional Sources
After receiving his Bachelor’s and Master’s degrees in Computer Science he spent several years working in IT management for small businesses. However, he now works full time writing content online and creating websites. His main writing topics include iPhones, Microsoft Office, Google Apps, Android, and Photoshop, but he has also written about many other tech topics as well. Read his full bio here.
You may opt out at any time. Read our Privacy Policy