A good font is often a matter of personal preference, and what is preferable to one person may not be preferable to another. Questions and issues with fonts are common among Microsoft Word 2010 users, as document formatting for specific institutions can vary. It is not always easy to remember to change your font whenever you create a new document so, if you are usually creating documents for work or school, then it may be in your best interest to set the default font to the one preferred by your boss or teacher. One of the more commonly preferred fonts is Times New Roman, but it may not be set as the default font in your Microsoft Word 2010 program. Fortunately this is a setting that can be changed, so continue reading below to find out how to set the Times New Roman font as the default option for new documents that you create. Occasionally a document might need a font that looks like script or handwriting, but you might not have one that you like. Our guide on cursive fonts in Word can show you a few good options to use instead.
How to Set Times New Roman as Default in Word 2010
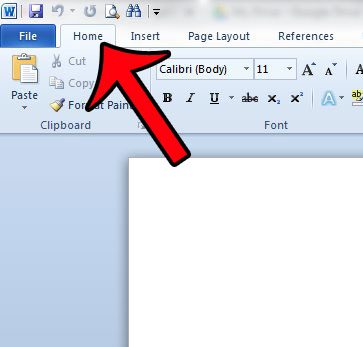
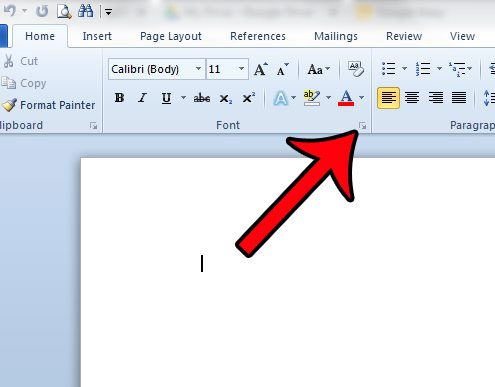
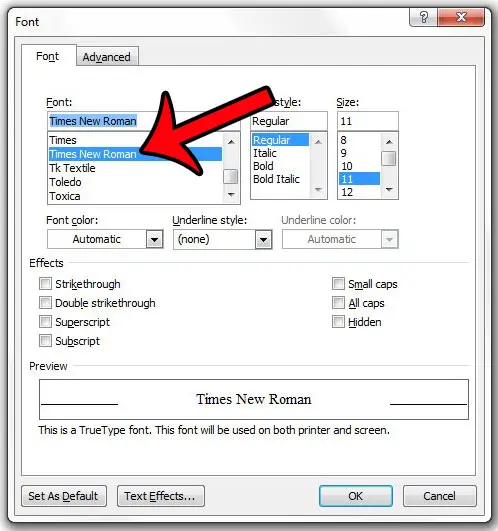
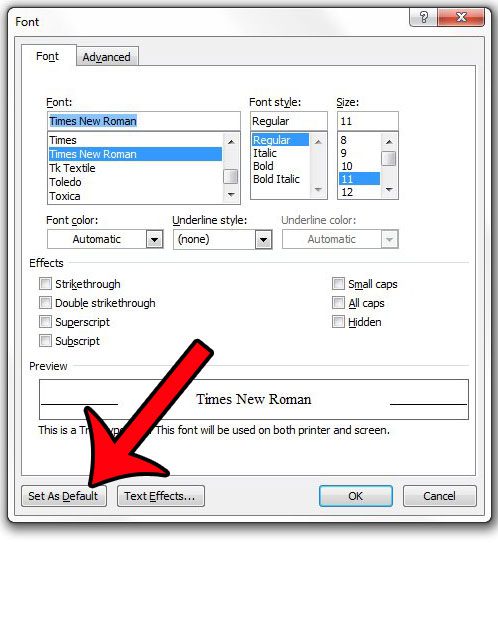
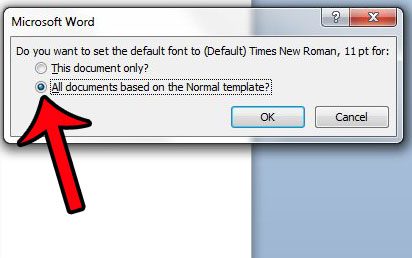
The steps in the article below will change the font that is used when you create a new document. However, documents that were created before you made this change, or documents that were created on a different computer, will still use the font that is defined in the document. If you wish to change the font in an existing document, then you will need to click inside the document, press the Ctrl + A keys on your keyboard to select the entire document, then change the font. Step 1: Open Microsoft Word 2010. If Word 2010 does not open with a blank document, then create a new blank document. Step 2: Click the Home tab at the top of the window. Step 3: Click the Font button at the bottom-right corner of the Font section in the Office ribbon. Step 4: Select Times New Roman from the list under Font. Note that you can elect to change other options for the default font as well, such as color, style, size, and effects. Step 5: Click the Set as Default button at the bottom-left corner of the window. Step 6: Click the circle to the left of All documents based on the Normal template, then click the OK button. If you close Microsoft Word 2010 then reopen it, Times New Roman should now be set as the default font. Note that you do not need to save the blank document after making the default font changes. The default settings are applied to the template, not the individual document.
Summary – How to make Times New Roman the default on Word
Do you have a new font that you would like to use in Word 2010? Find out how to install a new font in Windows 7 so that it is available to use in Word. After receiving his Bachelor’s and Master’s degrees in Computer Science he spent several years working in IT management for small businesses. However, he now works full time writing content online and creating websites. His main writing topics include iPhones, Microsoft Office, Google Apps, Android, and Photoshop, but he has also written about many other tech topics as well. Read his full bio here.
