Fortunately, the Mail app in iOS 9 on your iPhone includes a quick way for you to mark every email as read on your device. Our guide below will walk you through those steps so that you can remove that red circle with the number on it and start with an inbox of messages that are all marked as read.
How to Mark All Emails as Read on an iPhone 6
Our tutorial continues below with more information on marking all of your emails as read on an iPhone, including information on how to perform these steps in earlier versions of iOS.
How to Mark All of Your Emails as Read in iOS 9 (Guide with Pictures)
The steps in this article were performed on an iPhone 6 in iOS 9. However, these steps are still very similar in newer versions of iOS, such as iOS 15, and newer iPhone models like the iPhone 13.
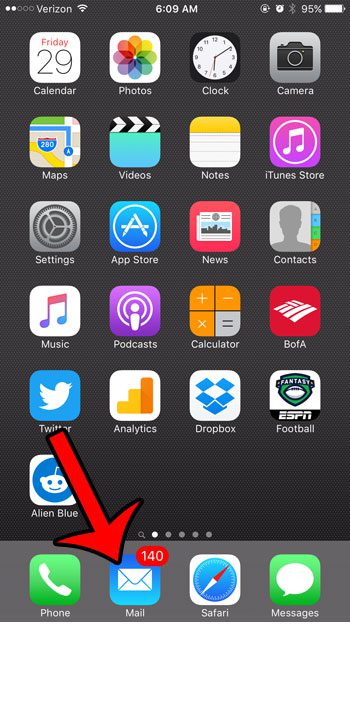
Step 1: Tap the Mail icon.
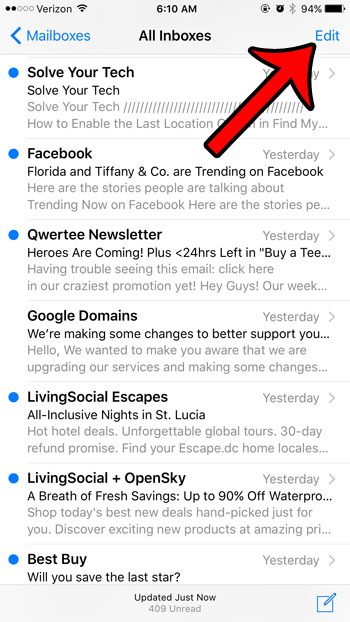
Step 2: Tap the Edit button at the upper-right corner of the screen.
Note that you will need to be in your inbox already for this to work. If it says Mailboxes at the top-left of the screen, then you will need to select the All Inboxes option, or the specific inbox of the account containing the messages that you wish to mark as read.
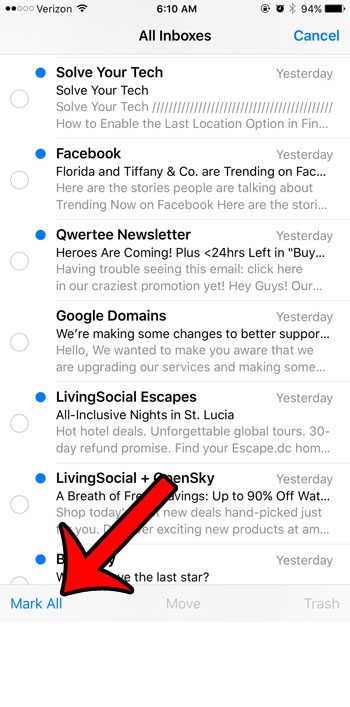
Step 3: Tap the blue Mark All button at the bottom-left of the mailbox.
In newer versions of iOS you will need to choose the Select All option at the top-left of the screen instead.
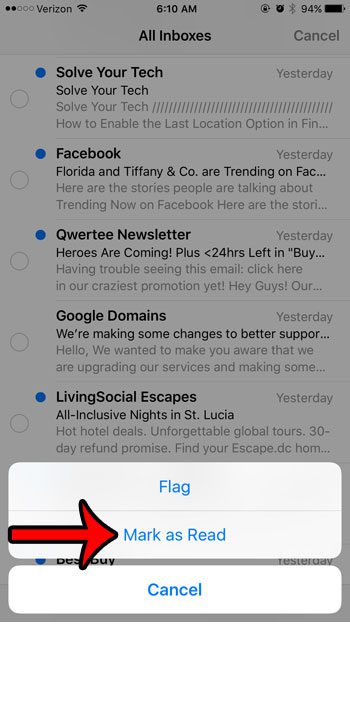
Step 4: Tap the Mark as Read option to complete the process.
In newer versions of iOS you will need to tap Mark at the bottom-left first, then choose the Mark as Read option. Note that it may take a minute or two to mark all of the messages as read if you had a lot of them in your inbox.
Can I Mark All Unread Messages as Read in the iPhone Mail App?
Yes, it is possible to perform this action using the steps outlined above. Essentially what you are doing is opening the mail folder containing the emails that you want to mark as read or unread, selecting all of them, then using the Mark tool at the bottom left of the screen. The steps look like this: Mail > Edit > Select All > Mark > Mark as Read If all of the emails in the current folder are already read then you will see a Mark as Unread option instead. You can use this to quickly mark all of your emails as unread on an iPhone, or you can select only a couple of read emails and mark those as unread if you don’t want to apply it to the entire folder.
More Information on How to Mark All Emails as Read – iPhone 6
If you use IMAP email on your email account then these emails are also going to be marked as read if you check your email account on a laptop or desktop computer, an iPad, or any other device where you have connected the email account. if you don’t want to mark all of your emails as read, and would prefer to do it on an individual basis, then simply opening the email will accomplish that. You also have the ability to move all of your emails to junk on an iPhone, flag all of your emails, move all of them to a different folder, or move them all to the trash. While the steps in this guide discuss how to mark emails as read through the “All Inboxes” option, this same process will work for individual email accounts as well. Simply tap the All Inboxes button at the upper-left corner of the screen, tap Edit at the upper right, choose Select All, then select Mark and Mark all read and unread emails as read through the Mail app.
There are many things that you can do on your iPhone to improve your battery life, but one setting that you can change concerns your email. Click here and learn how to change the fetch settings for an email account so that it only checks for new messages when you manually refresh your inbox.
Additional Sources
After receiving his Bachelor’s and Master’s degrees in Computer Science he spent several years working in IT management for small businesses. However, he now works full time writing content online and creating websites. His main writing topics include iPhones, Microsoft Office, Google Apps, Android, and Photoshop, but he has also written about many other tech topics as well. Read his full bio here.
You may opt out at any time. Read our Privacy Policy


