If you have printed a spreadsheet and found that it doesn’t have those lines, then you are able to change a setting in Google Sheets so that they appear. This setting will serve the purpose of both adding the gridlines to the spreadsheet that you view on your screen, as well as add them to the printed page.
How to Print the Lines on Your Spreadsheet in Google Sheets
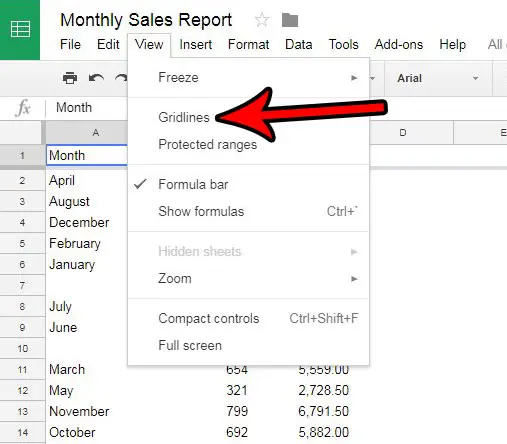
The steps in this article were performed in the Web-browser version of Google Sheets, specifically within the Chrome browser. Completing these steps will result in a spreadsheet that will include the horizontal and vertical lines that separate the individual cells on your spreadsheet. Step 1: Go to your Google Drive at https://drive.google.com/drive/my-drive and open the spreadsheet for which you would like to print the gridlines. Step 2: Click the View tab at the top of the window. Step 3: Click the Gridlines option. There should now be visible gridlines on your spreadsheet. When you go to the print menu by clicking File then Print, the preview window should display the sheet as it will be printed, including the gridlines separating your cells. Do you have a multi-page spreadsheet that is tough to read because there aren’t any column headings after the first page? Learn how to repeat the top row of your spreadsheet on every page so that the data in your columns is easier to identify.
See also
How to merge cells in Google SheetsHow to wrap text in Google SheetsHow to alphabetize in Google SheetsHow to subtract in Google SheetsHow to change row height in Google Sheets
After receiving his Bachelor’s and Master’s degrees in Computer Science he spent several years working in IT management for small businesses. However, he now works full time writing content online and creating websites. His main writing topics include iPhones, Microsoft Office, Google Apps, Android, and Photoshop, but he has also written about many other tech topics as well. Read his full bio here.

