But a printed spreadsheet can be very different than one that you view on your computer screen, and your audience may have difficulty keeping data straight on anything printed after page 1. A helpful way to resolve this problem is to print the header column at the left side of every page. This can help to reduce confusion, and ensure that the intended information is being conveyed to your audience.
Print a Column on the Left of Every Page in Excel 2013
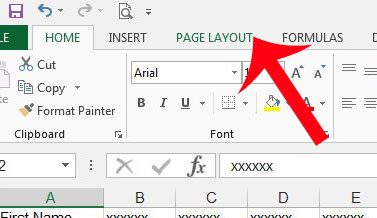
The steps in this tutorial will allow you to select a column that prints at the left side of every page that you print from Excel 2013. Note that columns have letters, and rows have numbers. If you instead want to print a row at the top of every page, then you can read this article. Step 1: Open your spreadsheet in Excel 2013. Step 2: Click the Page Layout tab at the top of the window.
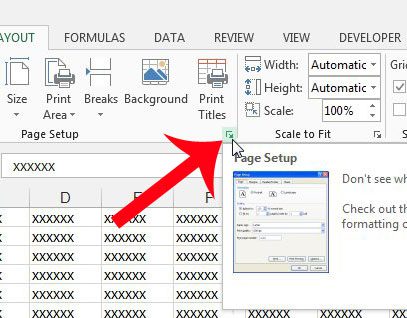
Step 3: Click the Page Setup button at the bottom-right corner of the Page Setup section of the navigational ribbon.
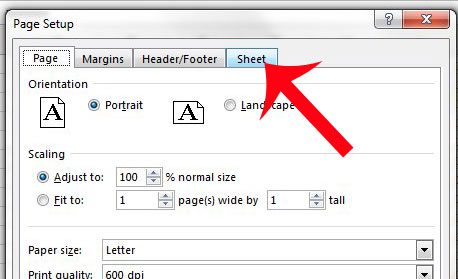
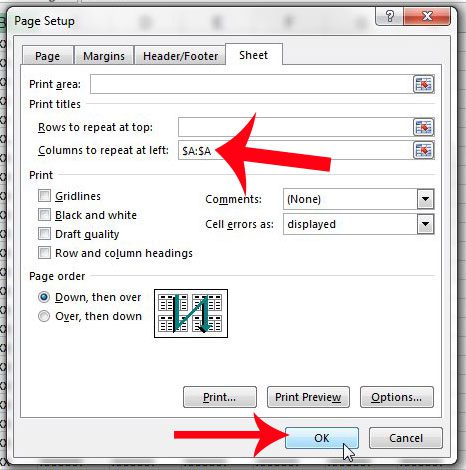
Step 4: Click the Sheet tab at the top of the window.
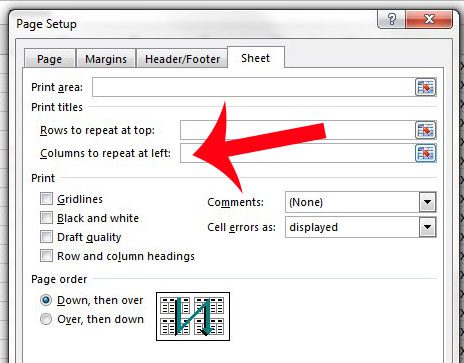
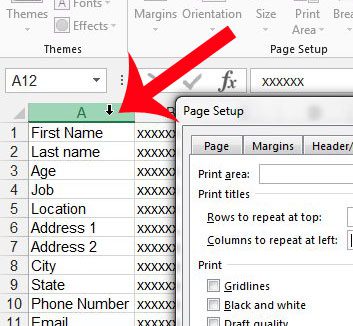
Step 5: Click inside the Columns to repeat at left field.
Step 5: Click the letter at the top of the spreadsheet for the column that you want to repeat at the left side of every page.
Step 6: Confirm that the value in the Columns to repeat at left field is correct, then click the OK button at the bottom of the window. You can then proceed to print your spreadsheet with your new settings.
Do you only want to print some of the cells in your spreadsheet? Find out more about printing a selection in Excel 2013 and learn about one of the ways that you can modify the way you print your spreadsheets. After receiving his Bachelor’s and Master’s degrees in Computer Science he spent several years working in IT management for small businesses. However, he now works full time writing content online and creating websites. His main writing topics include iPhones, Microsoft Office, Google Apps, Android, and Photoshop, but he has also written about many other tech topics as well. Read his full bio here.
