The first time you need to replace a printer’s cartridge it can be a little intimidating since it’s probably different from other cartridges you have replaced in the past. Fortunately, the cartridge replacement procedure on the Brother HL2270DW is only a few steps, which we will guide you through in our tutorial below. It is an unfortunate inevitability that we all need to replace our toner cartridges periodically. if your printer is showing as offline and you need to use it, then this guide will show you some troubleshooting steps to try and get it back online. Laser printers, such as the Brother HL2270DW, need to have their cartridges replaced less often but, when you do have to do it, the new toner can be a little expensive. And after spending the money on a new cartridge, it can be aggravating if you are having difficulty attempting to replace the old, depleted cartridge. So continue reading below to learn the process necessary to get rid of that old toner and replace it with a new, full one.
How to Change the Ink Cartridge on the Brother HL2270DW (Guide with Pictures)
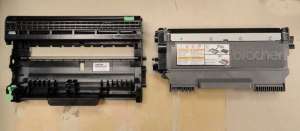
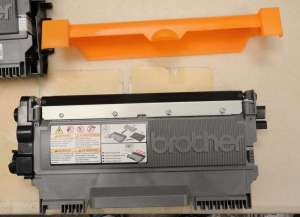
Before you attempt to replace the toner cartridge in your Brother HL2270DW, it’s important to know that there are actually two pieces to the toner puzzle. The first part is the drum, shown on the left in the image below. The toner cartridge is the piece on the right. When you first remove the old, combined cartridge and drum from the printer and compare it with the cartridge that you just purchased, they look very different. But you need to separate the cartridge from the drum before you can replace it with the new cartridge. With this knowledge in hand, you can follow the steps to replace your old Brother HL2270DW toner cartridge. Click on any of the images to make them larger.
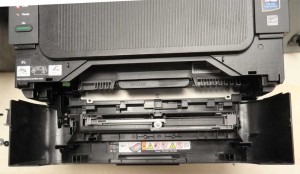
Step 1: Pull down the toner cartridge door.
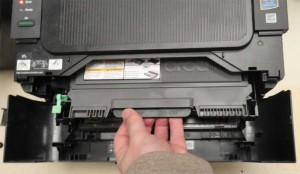
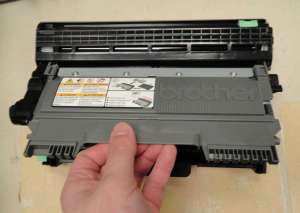
Step 2: Pull out the old cartridge and drum.
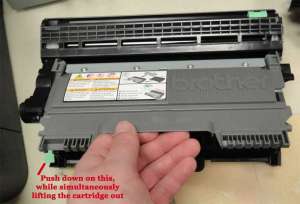
Step 3: Push down the green lever on the left while simultaneously pulling out the old cartridge, then remove the old cartridge from the drum.
Step 4: Gently shake the new cartridge side to side, then remove the protective plastic cover.
Step 5: Insert the new cartridge into the drum, pushing forward and down until you hear it lock in place.
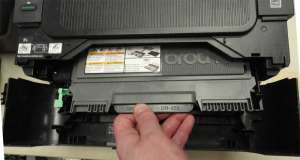
Step 6: Insert the drum with the new cartridge into the cartridge slot, pushing forward until you hear it lock in place.
Step 7: Close the toner cartridge door.
The printer will then check to make sure that the cartridge has been installed properly and will resume printing anything that is in your queue.
Summary – How to Replace Brother HL 2270dw Toner
Now that you know how to replace the toner cartridge on a Brother 2270 DW printer you will be able to perform this action pretty quickly and get back to printing your documents. Eventually you will probably need to replace the drum as well. You will notice that there is a light for it on the left side of the printer. You can purchase a drum for the Brother HL2270dw here. It is a similar process to replace the drum, especially once you are familiar with the difference between the drum and the cartridge. After receiving his Bachelor’s and Master’s degrees in Computer Science he spent several years working in IT management for small businesses. However, he now works full time writing content online and creating websites. His main writing topics include iPhones, Microsoft Office, Google Apps, Android, and Photoshop, but he has also written about many other tech topics as well. Read his full bio here.