If you do not have Windows Live Movie Maker on your computer, you can download it from here.
Rotating iPhone Video Using Windows Live Movie Maker
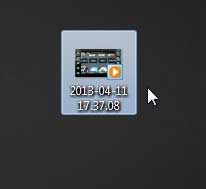
If you are preparing your iPhone video so that you can upload it to a video sharing service, then it is important that the video is optimized for people to view it correctly on their device screen. The nature of the event that you were recording likely required you to film it at a less than optimal angle, so now you have a video that needs to be rotate to be viewed properly. Luckily this process can be accomplished with Windows Live Movie Maker. Step 1: Locate the iPhone video on your computer. For the sake of simplicity, I have moved the video file to my Desktop.
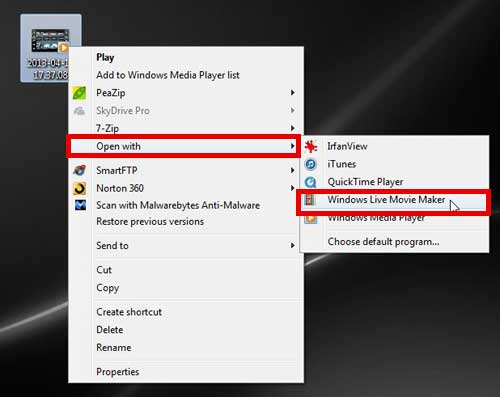
Step 2: Right-click the file, click Open with, then click Windows Live Movie Maker.
Step 3: Confirm that the Home tab is selected at the top of the window.
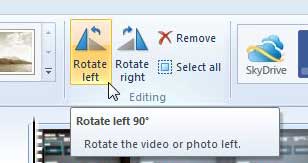
Step 4: Click the Rotate Left or Rotate Right button in the Editing section of the ribbon to properly orientate your video.
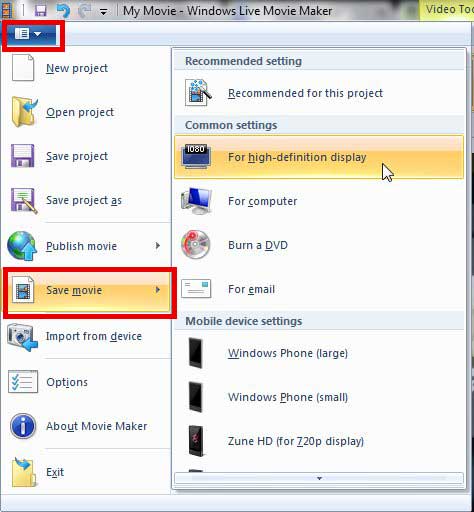
Step 5: Click the Movie Maker tab at the top of the window, click Save Movie, then click the desired size for your rotated video. Note that the higher the resolution, the larger the file size will be.
We have written a number of other helpful Windows Live Movie Maker tutorials that can help you edit your videos even more. After receiving his Bachelor’s and Master’s degrees in Computer Science he spent several years working in IT management for small businesses. However, he now works full time writing content online and creating websites. His main writing topics include iPhones, Microsoft Office, Google Apps, Android, and Photoshop, but he has also written about many other tech topics as well. Read his full bio here.


