But rather than actually turning off your iPhone, you can instead choose to use the Do Not Disturb function. It can be turned on manually, or you can have it turn on at a regularly scheduled period of time. If you had previously set up a scheduled Do Not Disturb, though, you may wish to turn it off if your schedule changes. Our tutorial below will show you how to turn off that scheduled option, or change it to a different period of time instead.
Stop a Scheduled Do Not Disturb in iOS 8
The steps in this article were written using an iPhone 6 Plus, in iOS 8.4. However, these same steps will work for other iPhone models that are using the same version of iOS, as well as other devices that are using iOS 7 or higher.
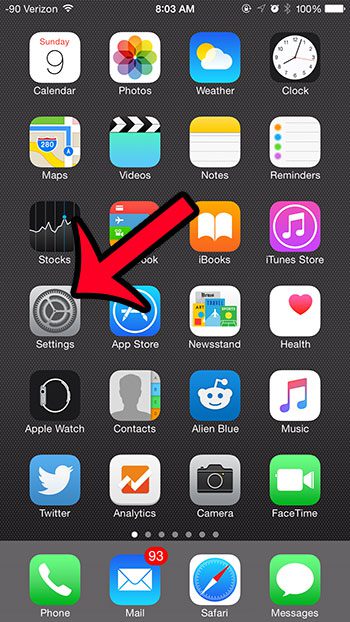
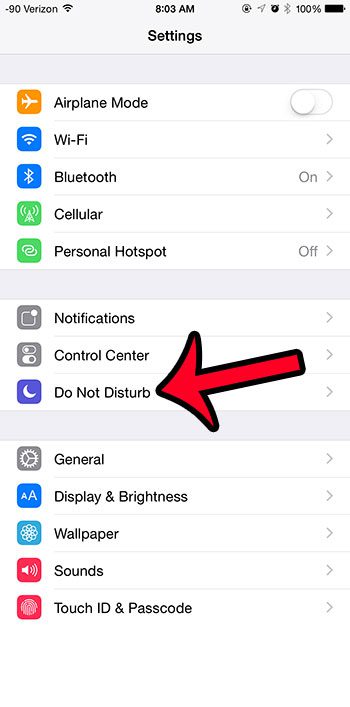
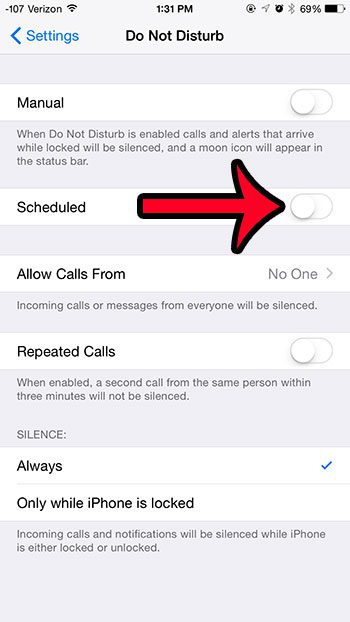
Step 1: Tap the Settings icon. Step 2: Select the Do Not Disturb option. Step 3: Tap the button to the right of Scheduled to turn it off. The option is turned off when there is no green shading around the button.
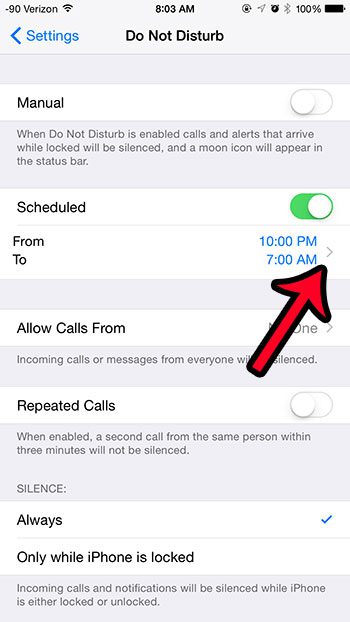
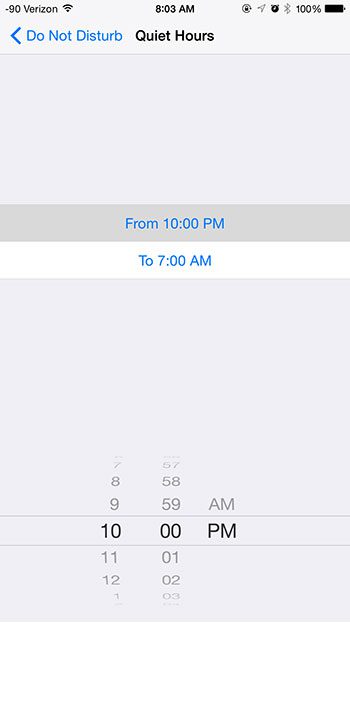
If you would instead prefer to change the scheduled period at which the “Do Not Disturb” feature is enabled, then tap the arrow to the right of the times.
You can then tap each time and use the wheels at the bottom to adjust the schedule
Is your iPhone ringing, even though you have the Do Not Disturb setting turned on? This may be occurring because your iPhone is unlocked. Click here to read about a setting that you can change so that your iPhone is always silent when you have enabled Do Not Disturb. After receiving his Bachelor’s and Master’s degrees in Computer Science he spent several years working in IT management for small businesses. However, he now works full time writing content online and creating websites. His main writing topics include iPhones, Microsoft Office, Google Apps, Android, and Photoshop, but he has also written about many other tech topics as well. Read his full bio here.
You may opt out at any time. Read our Privacy Policy
