Preview Powerpoint 2010 Presentation in Grayscale
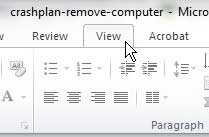
Viewing your Powerpoint 2010 file in grayscale will not actually convert the file to grayscale. This means that your images, videos and slide elements will still be in color if you need them – you are simply checking how everything will look when it is printed or viewed in grayscale. If you detect any problems with the slideshow in this view setting, then you can adjust those problems before they are presented to an audience. Step 1: Open the Powerpoint 2010 slideshow that you can want to view in grayscale. Step 2: Click the View tab at the top of the window.
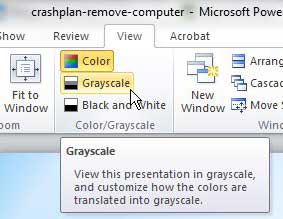
Step 3: Click the Grayscale button in the Color/Grayscale section of the ribbon at the top of the window.
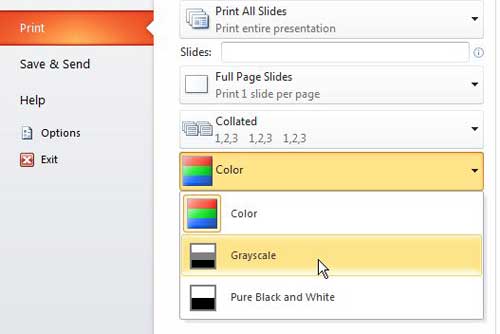
Step 4: Scroll through each of the slides in your presentation to see how they will look when they are printed or viewed in grayscale. make any adjustments if a slide element becomes difficult to see or understand. You can exit Powerpoint 2010’s grayscale mode when you are done by clicking the Grayscale button again. If you want to print in grayscale, you can do so by choosing the Grayscale option on the Color drop-down menu on the Print screen.
You might have noticed that there are also Black and White options in each of the locations references above. This option will convert everything to strictly black and white – there are no shades of gray. If you think that option might be preferable, you can choose it instead to see how your slideshow will look. After receiving his Bachelor’s and Master’s degrees in Computer Science he spent several years working in IT management for small businesses. However, he now works full time writing content online and creating websites. His main writing topics include iPhones, Microsoft Office, Google Apps, Android, and Photoshop, but he has also written about many other tech topics as well. Read his full bio here.
You may opt out at any time. Read our Privacy Policy


